Exploring AWS IoT Device Shadow
AWS IoT core provides a simple way to manage IoT lifecycle. It takes care of creating identity for a device, providing secure means of connecting to AWS IoT core using certificates and state maintenance using Device Shadow.
Device shadow is a simple json document that has desired property of a device as well as last reported property of that device. It allows user to read the data and control the device anytime. It can be updated by using MQTT or Rest API. Device shadow has its own reserved MQTT topics that allows user to create a new json document if there is none, get the current state if the device, update the json with new properties and delete the json document.

In this article we will see how to create a device shadow, how to update and delete it.
Prerequisites
1. Computer with good internet connection
2. AWS account with suitable permission to create IoT things
Creating a thing
To use device shadow, we need to create a thing in IoT core.
1. Log into AWS IoT core. Under the “manage” tab side, click “things”.
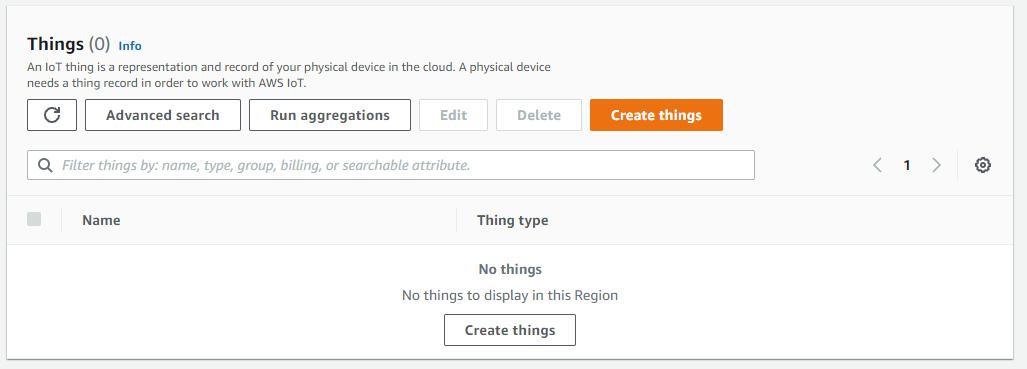
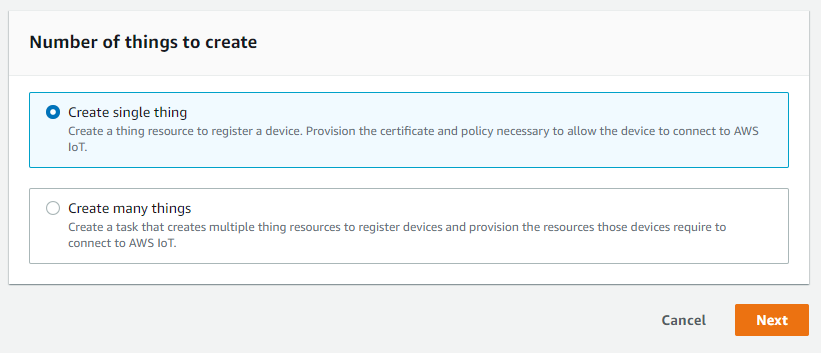
2. Select “Create things” from the options. Select “Create Single thing” and click next. Multiple things options is useful when you want to deploy multiple things at once which can be active on demand.
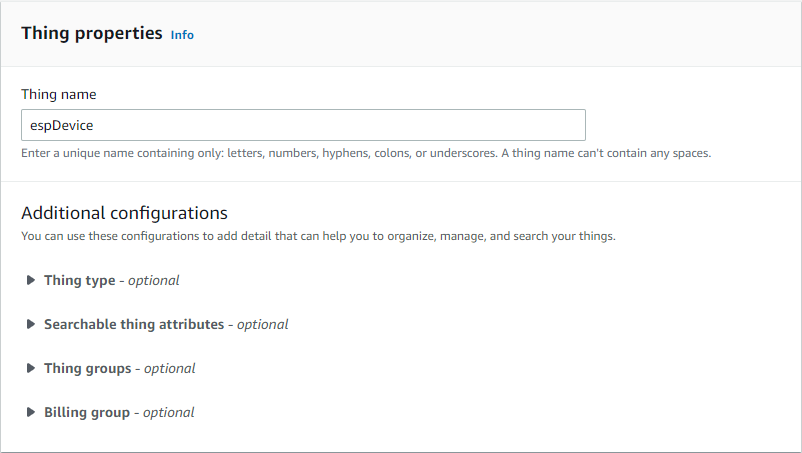
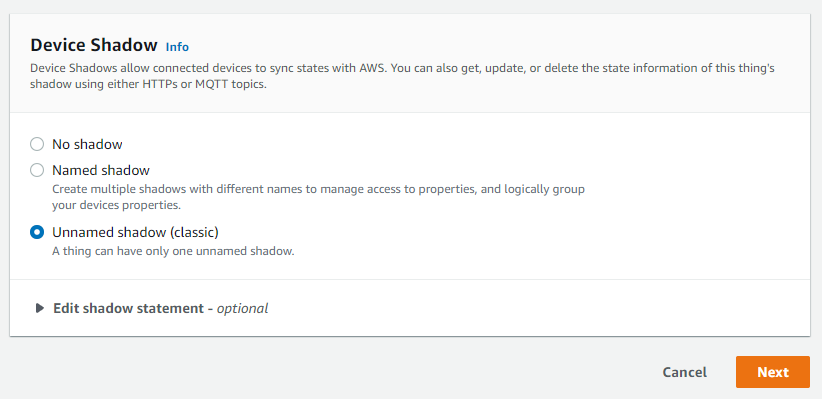
3. Under the thing property, enter a name for your thing. Under the device shadow, select “Unnamed Shadow” option. Considering we are only using device shadow for testing purpose, classic version is enough for now.
4. From device certificate options, select “Auto-Generate a new certificate”. Use the other options if your organization policy restrictions regarding external CA certificates. In case you have self-signed certificates, you can upload and verify it using this feature.
5. From the policy option, create a new policy or use the policy provided to you by your administrator. It is recommended to allow as minimum permission as possible. For now, we can create a thing that can have all permission. Click “Create Thing”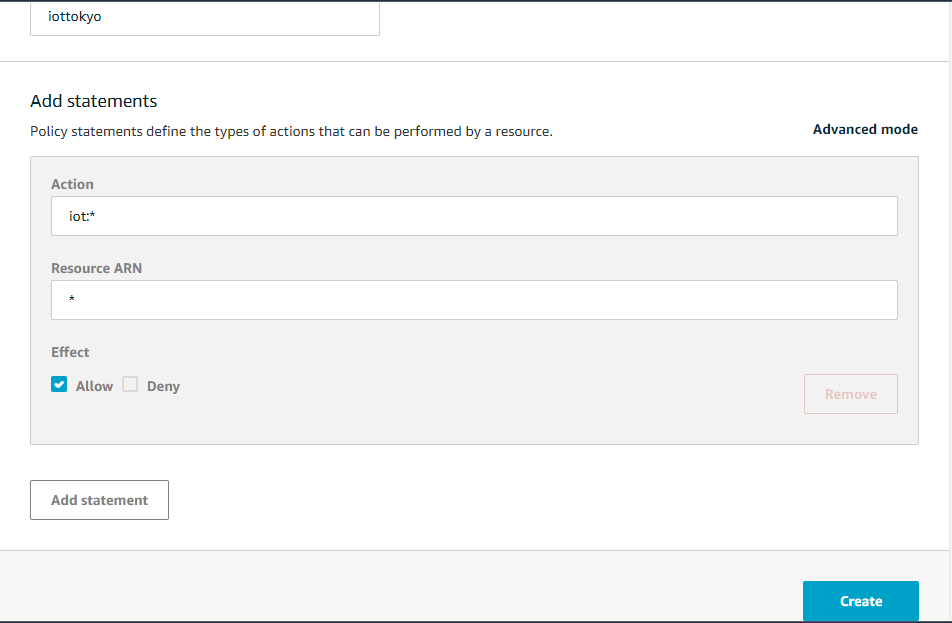
6. Make sure to download the device certificate, Key and CA certificate. Store the certificates in a secure location. Things use certificates to validate its identity. To disable a thing, we can temporarily detach the certificate or revoke it completely.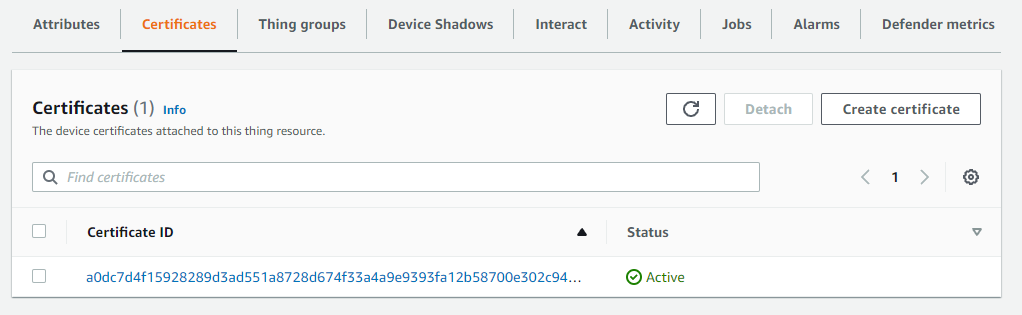
7. Select the newly created thing. You will see “classic shadow” with the following syntax to use device shadow under device shadow tab.
$aws/things/thingName/shadow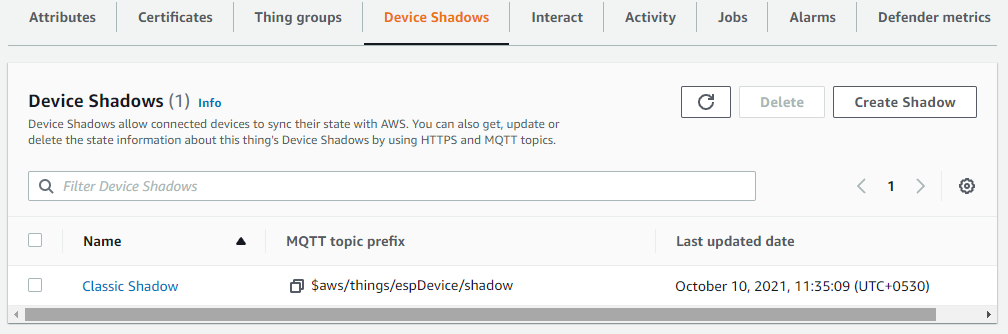
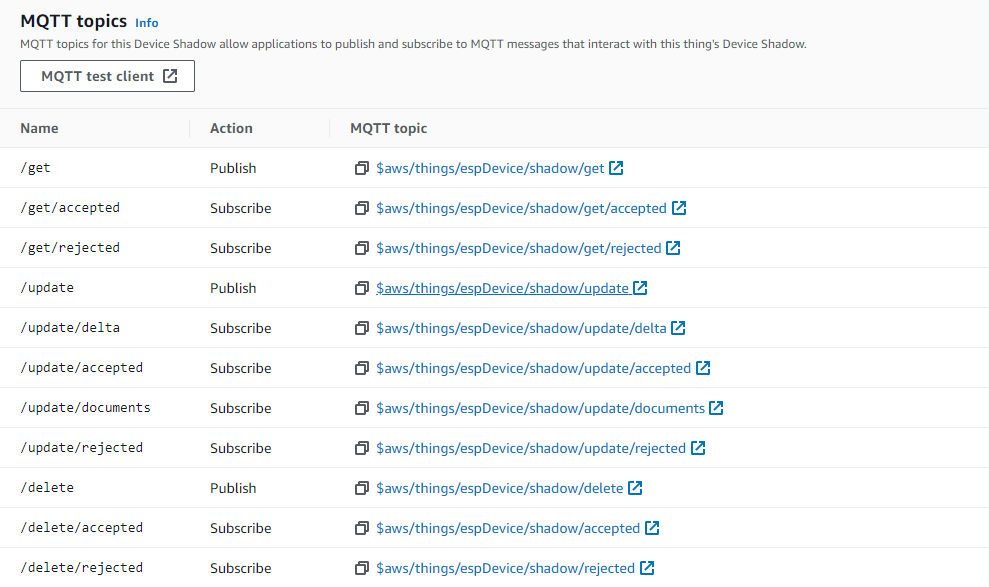
8. Click the syntax and it’ll show you reserved topics for device shadow.
Manipulating device shadow using MQTT
As mentioned earlier, a device shadow is a json document that can be manipulated by using MQTT or REST APIs. We will use AWS IoT core’s inbuilt message broker to test device shadow.
1. Deleting device shadow document
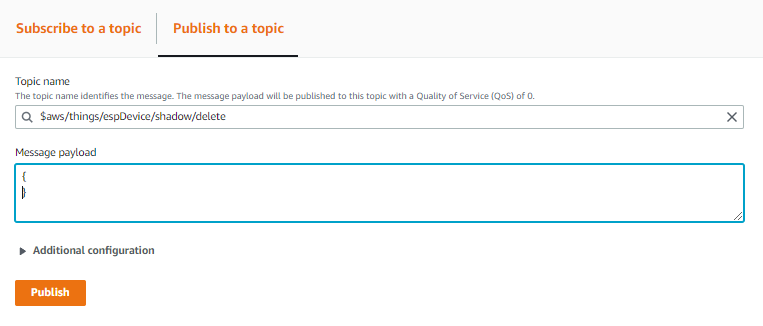
- When a device shadow is created, it is populated with a welcome message already. “delete” suffix allows users to delete the existing document. The thing needs to publish an empty “delete” message to delete the document.
- Click “$aws/things/espDevice/shadow/delete” and it’ll lead to inbuilt endpoint. Click publish option.
- Under subscriptions option, you’ll see two topics are already subscribed.
- On successful deletion, IoT core publishes the version and timestamp to “delete/accepted” topic.

- On payload, enter “;” without quotes and publish. The delete command will return error under “delete/rejected” option.

- If you try to delete the empty document, an error code and a warning stating there are no device shadow with specified thing name will be displayed.

- Close the tab
a. Under the device shadow reserved topics, click “$aws/things/espDevice/shadow/update” option and it’ll open a new tab.
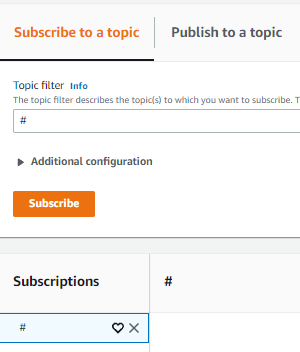
b. Under subscribe to topics options, the broker is already subscribed to “update/accepted” and “update/rejected”. Remove presubscribed topics and subscribe to “#”. It will now subscribe to all the topics passing through the broker.
c. Send a simple message in json format. Make sure to fill the desired state. Click the publish button.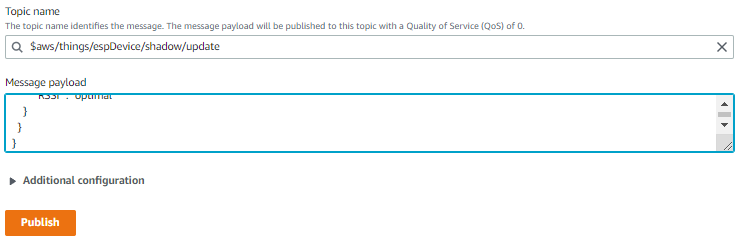
d. On successful update, you’ll the topic “update/accepted” with newly added desired states as well as metadata of those properties with timestamps attached to it.
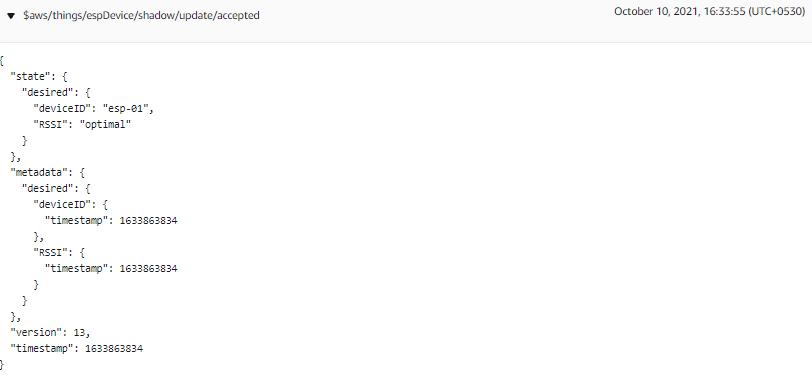
e. There are two new topics are present as well.
i. “update/documents” displays the previous content as well as current values.
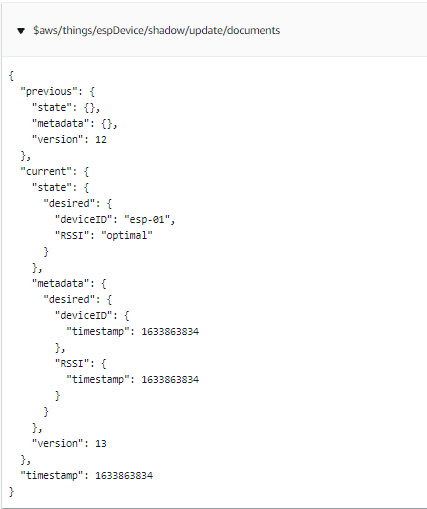
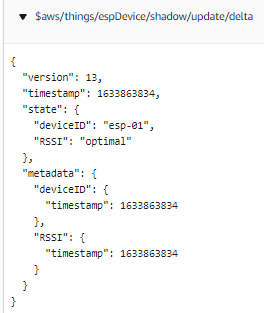
ii. “update/delta” displays the differences between current and previous document version.
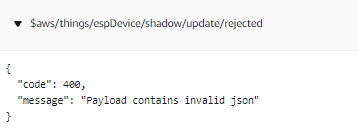
f. If the device shadow update fails, the broker will return an error code.
g. Further updates should be passed through reported state alone.
h. If it is accepted, delta and will be published along with document version comparison.
i. Else it will be rejected and will display an error code.
3. Retrieving the current device shadow document.
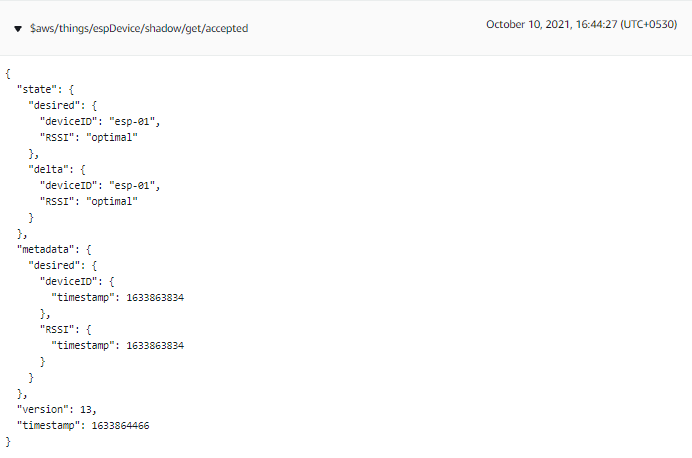
a. To perform an action based on data, the needs to match the desired property with reported property. The desired property can be send to device by “get” option.
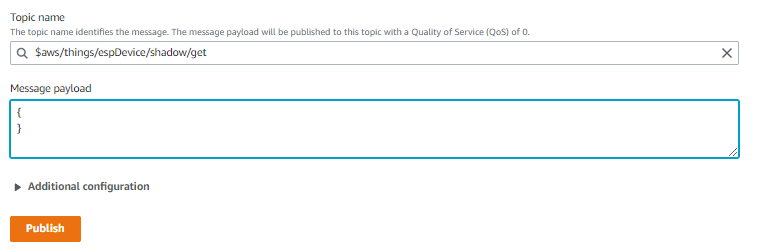
b. From the list of reserved device shadow topics, click “$aws/things/espDevice/shadow/get”. Publish an empty message, on successful publishing, desired as well as reported property will be available under “get/accepted” else error message will be available under “get/rejected”

In this article, we have briefly explored device shadow using built in endpoint. In the next article we will see how to connect an IoT device to AWS IoT core using the certificate we created and controlling the device using device shadow.
 Neuralink
  The world’s most widely adopted AI developer tool - GitHub Copilot
  Cyber Security
  Ngrok
Ngrok 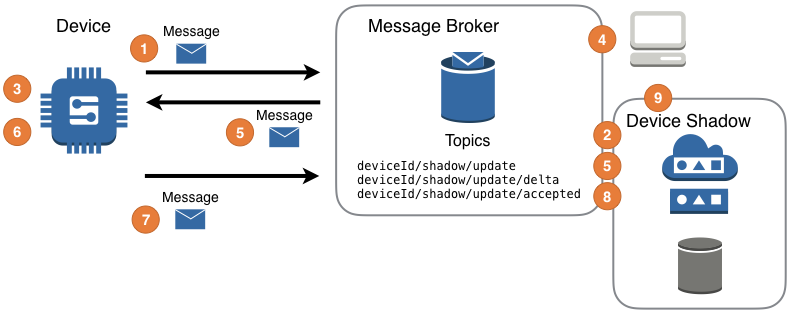 Exploring AWS IoT Device Shadow